


難易度:★★☆☆☆
所要時間:40分
着せ替えで自分だけのスタイルが楽しめるドール。近年ハンドメイドジャンルの中でも人気が高まっています。
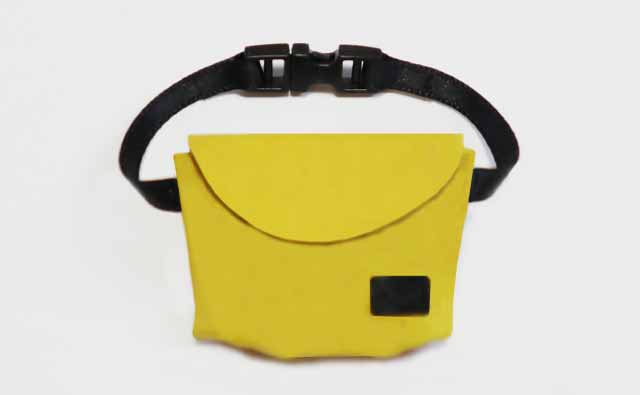
今回ご紹介するのは、ドール服に合わせてコーディネートできるボディバッグの作り方です。ミニチュアサイズなのに本格的なつくりのドール用ミニバックルを使用します。
ドール服だけではなく小物づくりにも挑戦したいという方は、レシピを参考に手作りしてみて下さいね。
ドールとは?
ドールとは着せ替えが楽しめる人形をいいます。着せ替えの幅は広く、リアリティのある衣装や小物を組み合わせられるのが魅力です。
また、オリジナルな衣装や小物を制作したり、一緒にお出掛けするなどさまざまな楽しみ方があります。
ドール用の資材を揃える「ラシックドール」では、ドール本体のほかドールサイズのカットクロスやパターン、ミニサイズのボタンなどアイテムの提案を行っています。興味のある方は商品ページをご覧下さい。
→「ラシックドール」の商品ページはこちら
使用材料
カラーブロード……KTF-01/51
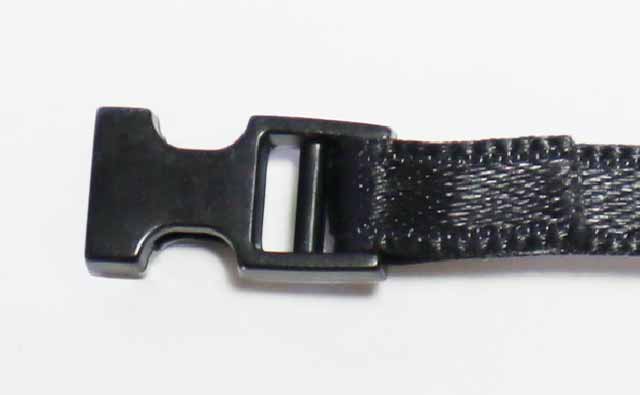
ドール用ミニサイドリリースバックル……LCDMP-10/BK
サテンリボン 4mm巾……M7500-4/09
スリム面ファスナー 粘着あり……SUN51-111
フェルト……KT1001/112
手芸用接着剤
※このページに記載の材料・道具は時期により未入荷・廃番の可能性もございます。
また、詳しい在庫状況は店頭にてご確認下さい。
作り方
まずはパターンをチェックしましょう。

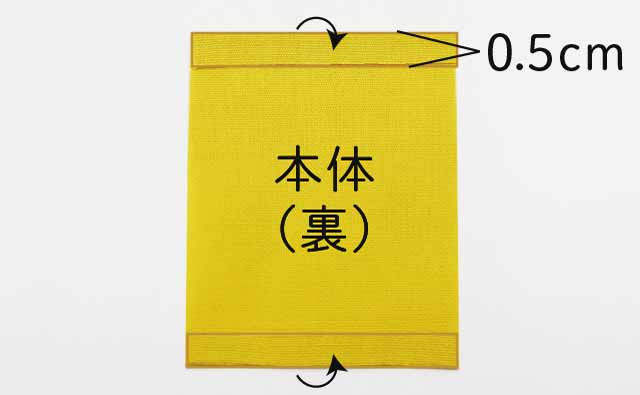
手順1
パターン通りにカラーブロードを裁断します。本体の上下を裏側に折って手芸用接着剤で貼ります。
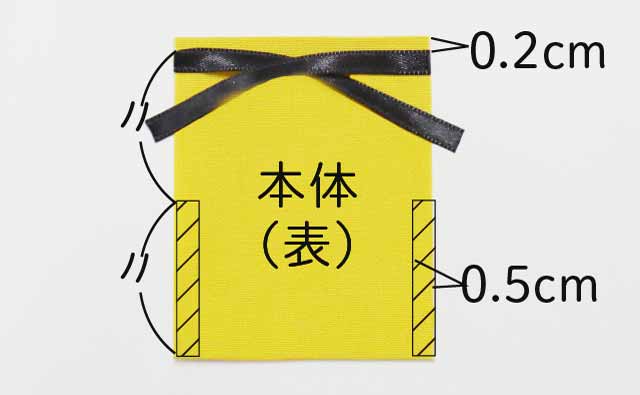
手順2
サテンリボン4mm巾を5cmで2本カットします。本体(表)にカットしたサテンリボンを仮止めし、斜線部分に接着剤を塗ります。
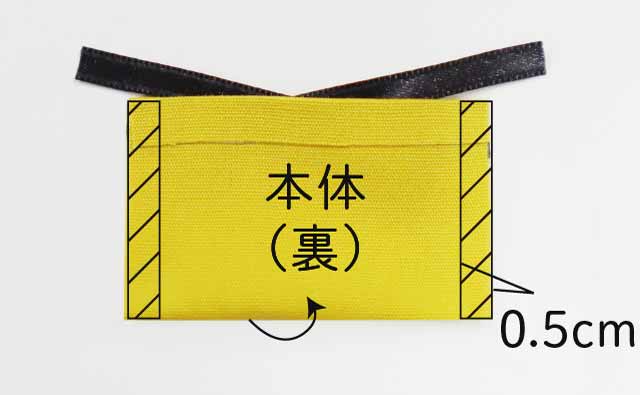
手順3-1
中表に半分に折って貼り、斜線部分に接着剤を塗ります。
手順3-2
のりしろ部分を折って貼りつけます。

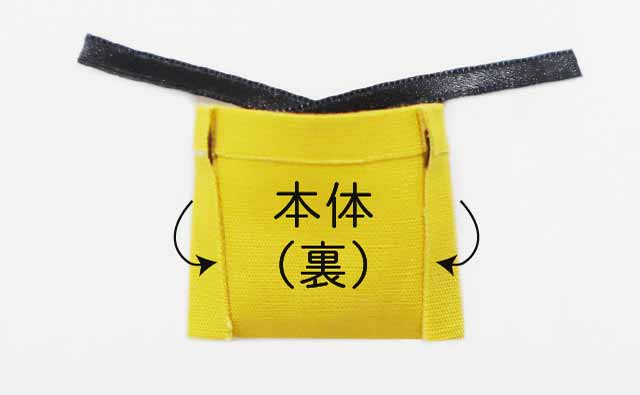
手順4-1
マチを作り、斜線部分に接着剤を塗ります。
手順4-2
折り上げて貼ります。

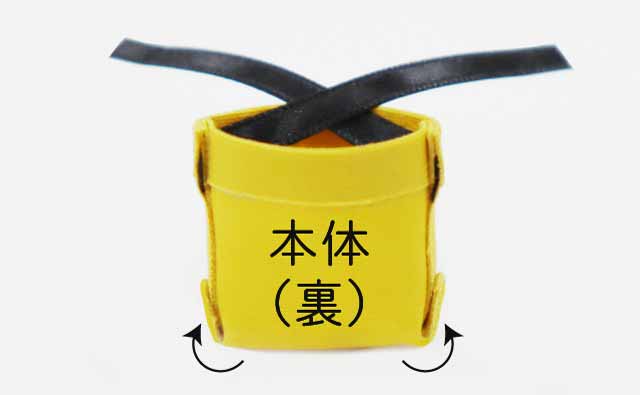
手順4-3
本体(表)に返します。
手順5-1
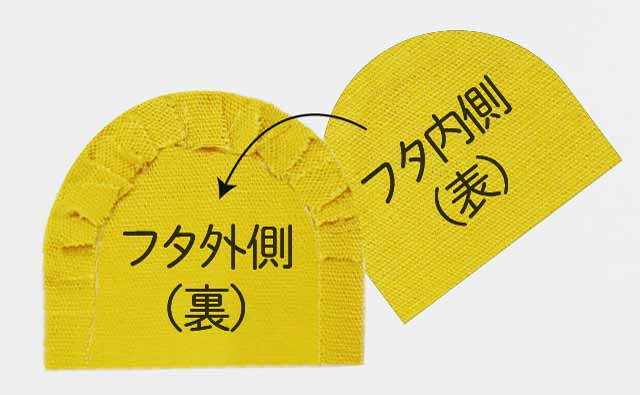
フタ外側(裏)ののりしろに切れ目を入れ裏の方に折って貼ります。
手順5-2
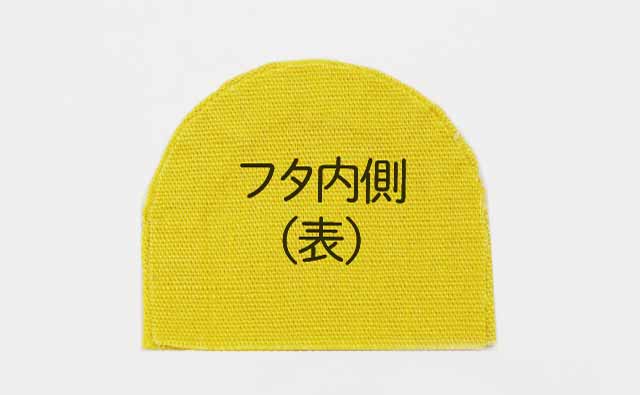
フタ外側(裏)にフタ内側(表)を貼り合わせます。
手順5-3
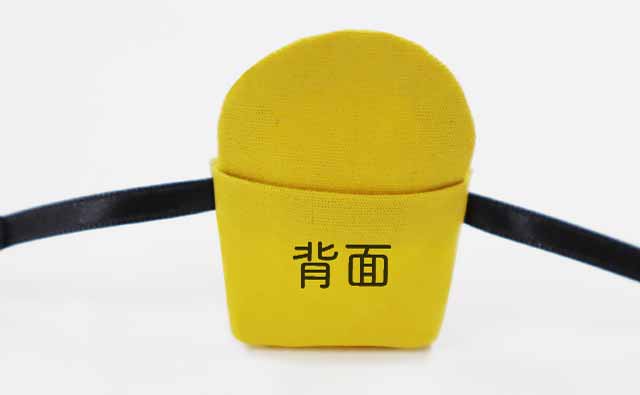
本体にフタを差し込んで貼ります。
手順6-1
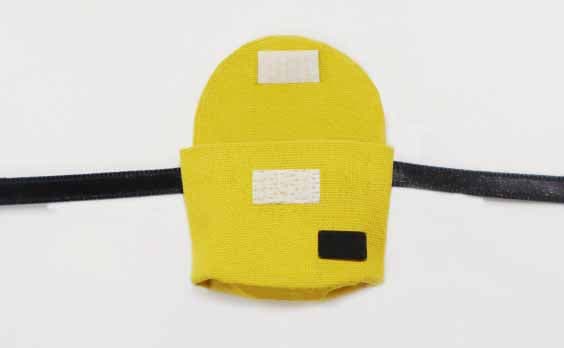
カットしたスリム面ファスナーとフェルトを貼ります。
手順6-2
サテンリボンの端にドール用ミニサイドリリースバックルを通します。
手順7
端を折って貼り、完成です。
できあがりです!

レシピ通りに進めると、可愛らしいボディバッグの完成です!取り外し可能なミニバックルで本格的な小物がつくれましたね。
ミニバックルは、ボディバッグ以外のバッグ制作に活用できるおすすめアイテムです。手作りの小物や衣装で、自分だけの着せ替えを楽しんで下さい。
クラフトレシピを多数公開中
ブログ内ではドール以外のクラフトレシピを多数掲載中です。レジンをはじめ水引やリベリーノなど多彩なジャンルを揃えています。ハンドメイドがお好きな方は、ぜひレシピを参考に作品づくりに挑戦してみて下さいね。
